This post from the free file converter - MiniTool Video Converter will teach you how to make OBS capture part of screen on a Windows computer.
OBS is free and open-source software for video recording and live streaming. Its flexibility and recording capabilities make it a popular screen recording application for YouTube content creators.
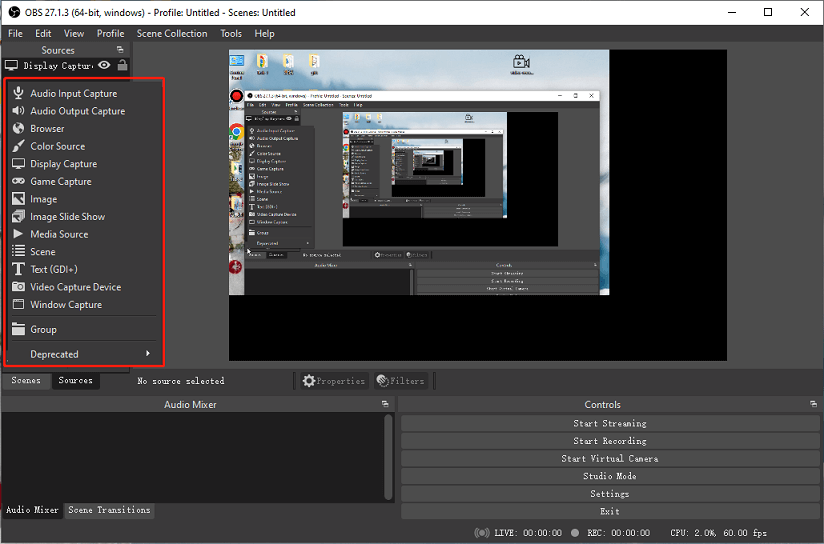
OBS provides various sources to help record different activities on your computer. Common sources in OBS include:

When adding a source in OBS, you will find that there is no such option that allows you to record only part of the screen. Secondly, unlike other screen recorders, OBS also doesn’t let you directly drag your mouse to select the recording area.
Still, you can use OBS to record only part of your screen. How to let OBS capture part of screen? Let’s skip to the next section.
![How to Fix OBS Stuttering When Recording [Ultimate Guide]](https://images.minitool.com/videoconvert.minitool.com/images/uploads/2023/04/obs-stuttering-when-recording-thumbnail.jpg)
What can you do when OBS stuttering? How to get a smooth recording in OBS? How to fix OBS stuttering when recording? Look through this post now.
How to capture only part of the screen with OBS? Follow the steps below:
Step 1. Download OBS from the official website and install it on your computer. During the installation process, please note that you should select Optimize just for recording, I will not be streaming option in the Auto-configuration wizard.
Step 2. Once the installation is finished, open OBS on your device.
Step 3. Make settings before recording.
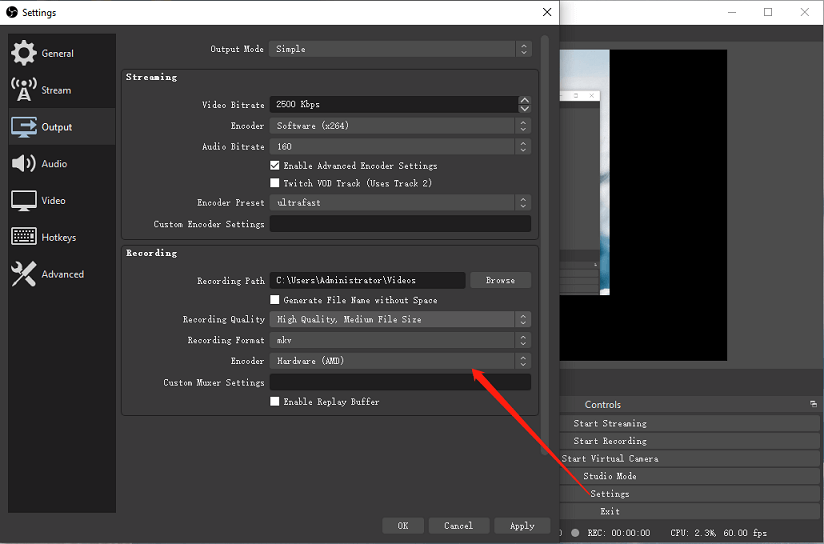
Tap Settings in the lower right corner. Then, click Output on the left and you can select the recording path, quality, and format (MKV, FLV, MP4, MOV, and TS) in the Recording section. Don’t forget to click Apply > OK to save your changes.
Step 4. To let OBS record part of screen, do one of the following:
Option 1:
Under the Sources tab, click the + icon and choose Display Capture from the pop-up menu. Give a name to the capture and click OK. Then, click OK in the next menu.
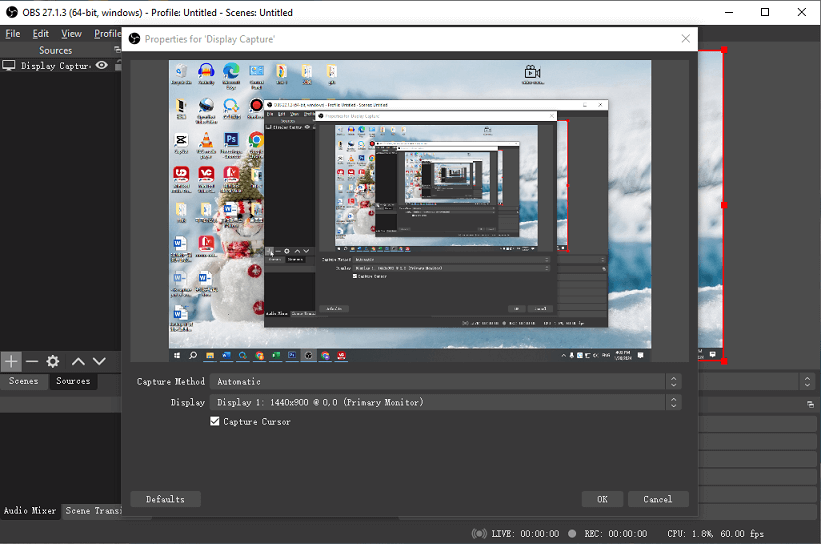
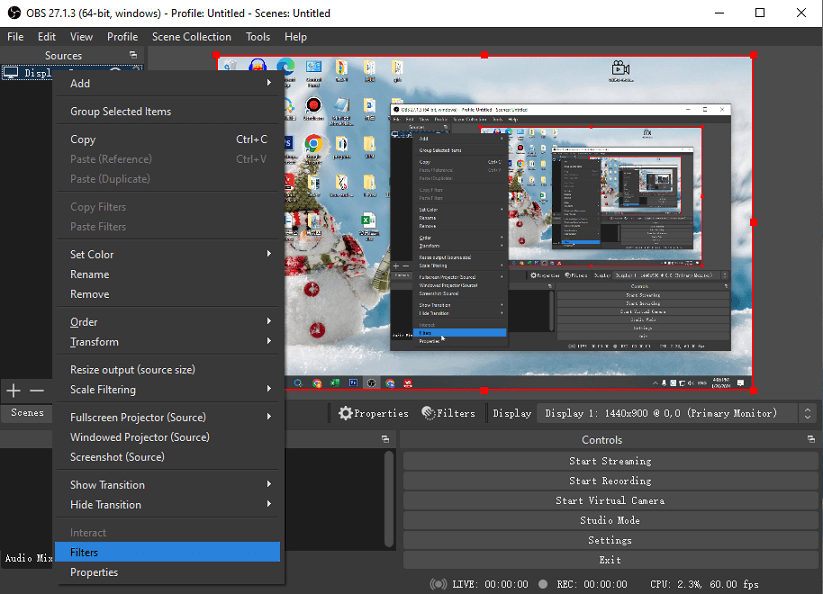
Next, right-click on the source you added and choose Filters from the dropdown list.
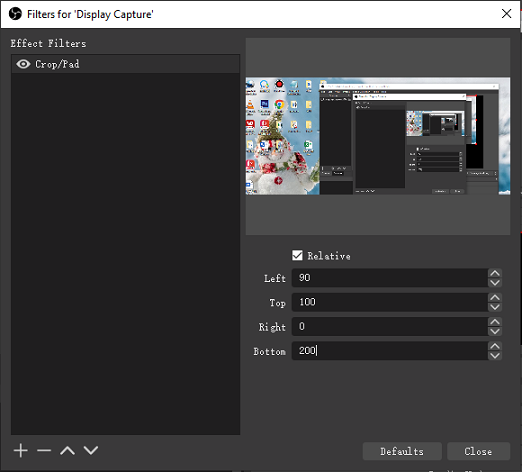
From the Filters for Display Capture window, click the + icon in the bottom-left corner, select Crop/Pad, and click OK.
Adjust the display size by changing the cropping parameters to record a partial screen. Enter pixel values in Left, Top, Right, and Bottom to remove unnecessary areas. Finally, click Close.
Option 2:
Add a source in OBS. Press the Alt key and your keyboard and the left button on your mouse. Then, drag and drop any sides of the red rectangle to choose the area you want to record.
Option 3:
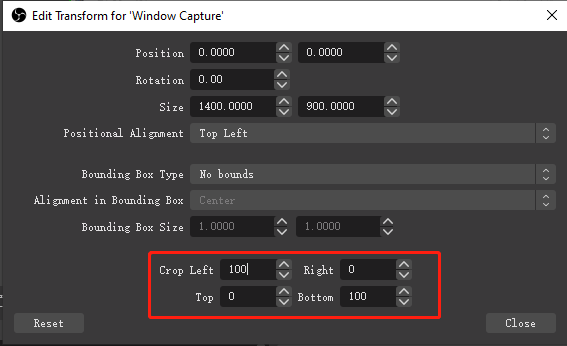
Right-click on your source and select Transform > Edit Transform. Next, set the cropping parameters.
Step 4. If you want to record the partial screen with audio, just click + and choose Audio Input Capture.
Step 5. Click the Start Recording button to start capturing part of the screen. To stop the recording, click the Show hidden icons button, then click the OBS Studio button, and select Stop Recording.
What’s OBS audio delay? How to do audio delay fix on OBS or OBS Streamlas? Have you got your problem solved? If not, look here for solutions!
If you want an easier way to record part of the screen, MiniTool Video Converter is a great choice. It allows you to record any area on your desktop for free, with no time limit and no watermark.
Step 1. Download and install MiniTool Video Converter on your PC.
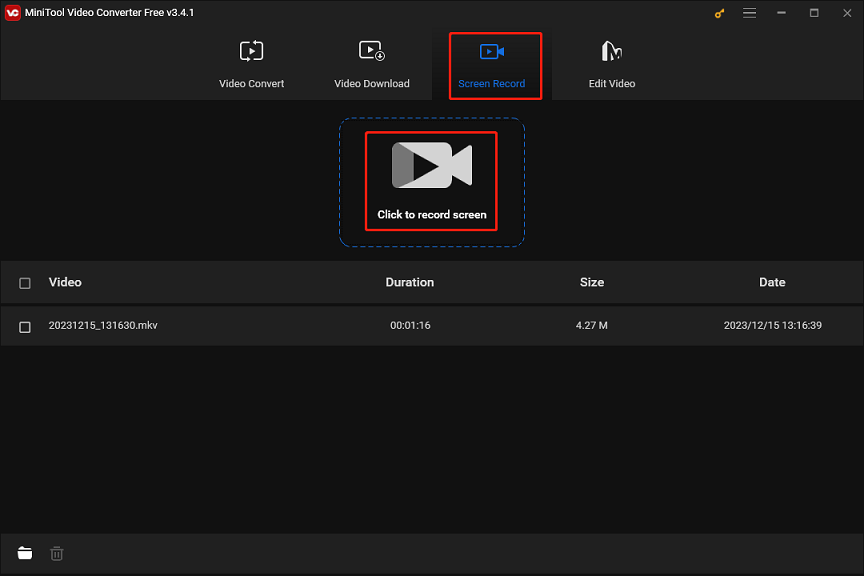
Step 2. Open this application and go to the Screen Record tab. Then, click the Click to record screen area to activate MiniTool Screen Recorder.
Step 3. Click the arrow next to Full screen, click the Select region option, drag your mouse and move the red rectangle to choose the recording area.
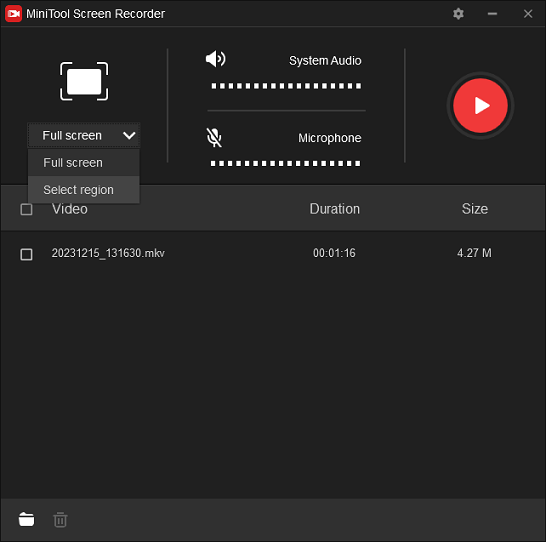
Step 4. Click the Settings icon in the upper right corner to choose the output location, recording format (MP4, WMV, MKV, AVI, MOV, FLV, and TS), quality, frame rate, and more. Click OK to save your changes.
Step 5. Click the red Record button to start the recording. To stop the recording, press F6 or your personalized shortcut.
Where does VLC save recordings? How to change the VLC video recording directory? Is there any VLC alternative to record videos? Check out this post now!
You can have OBS capture only part of the screen, but this requires extra steps, while other handy screen recorders like MiniTool Video Converter allow you to select the recording area via drag and drop.
Cora works as an editor at MiniTool for many years, writing articles about video editing, video conversion, and screen recording. She also writes articles about Instagram, Facebook, TikTok, Snapchat, and Twitter. During her spare time, Cora loves reading, traveling, and watching movies.